

Configure your Identity Provider
Overview
The OpenID4VCI and OIDC Bridge issuance workflows augment your existing identity management infrastructure. You can leverage an existing Identity Provider (IdP) to authenticate users and retrieve information required to generate verifiable credentials and make them available to an end-user's digital wallet.
If you are unfamiliar with OpenID Connect, the identity protocol underpinning the OpenID provisioning capability, there are many excellent guides available online such as this guide from Google, or this guide from Mozilla.
Prerequisites
You can use any OpenID Provider as long as it supports the following capabilities specified by OpenID Connect Core and OpenID Connect Discovery:
Must publish the OpenID Provider configuration at
/.well-known/openid-configurationMust support Authorization Code flow
Must support the
stateparameter
These are required to allow the OpenID4VCI issuance workflow to engage with your IdP and accept an ID Token containing the end-users claims.
Identity Provider configuration
Perform the following steps to ensure your IdP is properly configured and ready to be used to issue verifiable credentials:
Step 1: Create your Identity Provider
If you don't have an existing IdP, we offer a number of tutorials on how to set up an IdP with the following providers (remember you can use any IdP provider as long as it meets the outlined requirements):
Step 2: Update the OpenID configuration file
Browse to https://<your-host-domain>/.well-known/openid-configuration (it should be publicly available) and verify the following values exist (other options may validly sit alongside):
1{
2    "authorization_endpoint": "https://your-auth-endpoint/auth",
3    "token_endpoint": "https://your-token-endpoint/token",
4    "jwks_uri": "https://your-jwks-endpoint/jwks",
5    "response_types_supported": [
6        "code"
7    ],
8    "grant_types_supported": [
9        "authorization_code"
10    ],
11    "token_endpoint_auth_methods_supported": [
12        "client_secret_basic"
13    ],
14}
Step 3: Setup an application client on your Identity Provider
Setup an application client on your IdP:
Make note of your
client_idandclient_secret.Use an example callback URL (also known as
redirect_uri) e.g.https://example.com/callback. We will update it after you create an authentication provider configuration.
Step 4: Run a manual test to request an ID token
1. In a new browser window, make a request of the following structure:
1https://auth0-tenant.au.auth0.com/authorize
2?scope=openid%20profile
3&response_type=code
4&client_id=<your_client_id>
5&state=xqw2Lcafhx0NIoX0
6&nonce=kjfhuo34hPxksklj
7&prompt=login
8&redirect_uri=https://example.com/callback
Use the
authorizationendpoint defined in your IdP/.well-known/openid-configurationfile. This example uses an Auth0 IdP.response_type: Usecodeto indicate the expected response type.client_id: Use theclient_idfor the client application you created on your IdP.state: Use any random string.nonce: Use any random string.prompt: Useloginto prompt your IdP to display the login screen.redirect_uri: Use the example URI you used for the client application you created on your IdP.
2. Authenticate with the IdP using a user that you have set up on it.
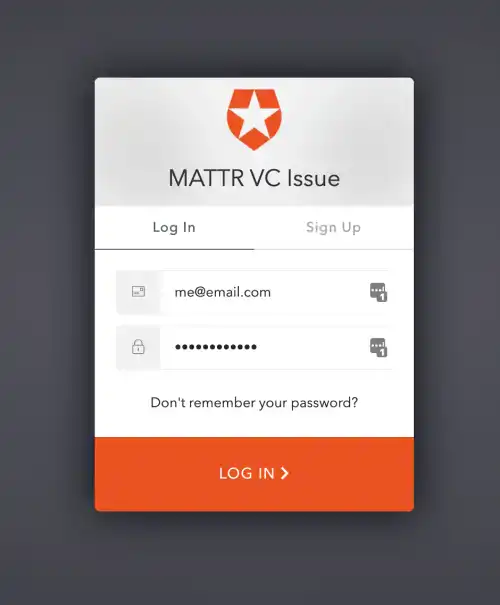
Example Auth0 login page
3. The redirect will terminate, but you can still retrieve the code from the query parameter:
1https://example.com/callback?code=oLxCRk2oPgfR8QU3&state=xqw2Lcafhx0NIoX0https://example.com/callback?code=oLxCRk2oPgfR8QU3&state=xqw2Lcafhx0NIoX04. Construct a request of the following structure to the /token endpoint of your IdP tenant:
1curl --request POST \
2  --url https://auth0-tenant.au.auth0.com/oauth/token \
3  --header 'Content-Type: application/json' \
4  --header 'Authorization: Basic dkowU0NLY2hyNFhqQzB4SE5FOERrSDZQbWxnMmxrQ046UU53ZmE0WWk0SW05enkxdV8xNW43U3pXS3QtOUc1Y2RIMHIxYk9OUnBVUGZOLVVJUmFhWHZfOTB6OFY2LU9qSA==' \
5  --data-raw '{
6    "grant_type": "authorization_code",
7    "code": "oLxCRk2oPgfR8QU3",
8    "redirect_uri" : "https://example.com/callback"
9}'
url: We are using an example from Auth0. Replace with the correct URL for your IdP.header:Use
Content-Type: application/json.Use your
client_idandclient_secretto create theAuthorization: Basicheader encoded with Base64 using a tool similar to base64url.com. The string should be formatted asclient_id:client_secretprior to being encoded.
data-raw:grant_type: Useauthorization_codecode: Use the value captured from the above redirect. This is time sensitive, you have about 5 mins!redirect_uri: Use the same value as the request.
5. The response should include the id_token.
1{
2    "access_token": "-vtm3ahlh9k_V2uDjnZ5r2MPbKRaHpA1",
3    "id_token": "eyJhbGciOiJSUzI1NiIsInR5cCI6IkpXVCIsImtpZCI6IlJUVXdOVEpCTXpJNFJUTTNNVGt4TURnNU5EVTJRamRETlRVNVJrWTNNamMyTTBWRU1FVkJPUSJ9.eyJodHRwczovL215dGVuYW50Lm1hdHRyLmdsb2JhbC90cmFpbmluZ0NlcnQiOiJQYXNzZWQgQSsiLCJuaWNrbmFtZSI6Im1lIiwibmFtZSI6Im1lQGVtYWlsLmNvbSIsInBpY3R1cmUiOiJodHRwczovL3MuZ3JhdmF0YXIuY29tL2F2YXRhci84ZjlkYzA0ZTZhYmRjYzlmZWE1M2U4MTk0NWM3Mjk0Yj9zPTQ4MCZyPXBnJmQ9aHR0cHMlM0ElMkYlMkZjZG4uYXV0aDAuY29tJTJGYXZhdGFycyUyRm1lLnBuZyIsInVwZGF0ZWRfYXQiOiIyMDIwLTA0LTMwVDA3OjUxOjA4Ljk0MloiLCJpc3MiOiJodHRwczovL2Rldi1yb2w0d29hby5hdS5hdXRoMC5jb20vIiwic3ViIjoiYXV0aDB8NWU2NmVjZjZlNWNjZjUwY2QwMDNmZjIwIiwiYXVkIjoidkowU0NLY2hyNFhqQzB4SE5FOERrSDZQbWxnMmxrQ04iLCJpYXQiOjE1ODgyMzQwNzEsImV4cCI6MTU4ODI3MDA3MX0.KLrMUoqz5mrvNQQ3K09eFijVg3qkmT17R_zOUvVhtfC8LvUWaBYpszQ7j3x3zCZ1TsS4ATS68kcxLfSbq7A71atYVzwjKvGwGce9IjH7cRKyIO8Z1RAcSCw7ncXBOzT_O20sH3BV_ZgPHEJA2PreKQERKjcKSCHJeRaPyqVbh2v2lSHYCm6e8HdB8v_Zq0looLvxS5afQ8PMn3k36COo13F4zvLuUn9is--B-SRUqUjSX6-KOvULa1HXbQVnO6RUNiijQSbN-ZLA_6TRQC8BKoT3-8v1cLSb49sZOXGSBHkkNHGBhMXeJuw4iD8IjYQWpcXlVRQHuCQwFgSHxdez9w",
4    "scope": "openid profile",
5    "expires_in": 86400,
6    "token_type": "Bearer"
7}
6. Copy the id_token value and paste it into a tool like jwt.io to inspect the payload of the ID token:
1{
2    "https://YOUR_TENANT_SUBDOMAIN.vii.mattr.global/educationalCredentialAwarded": "Certificate Name",
3    "updated_at": "2020-04-30T07:51:08.942Z",
4    "iss": "https://dev-rol4woao.au.auth0.com/",
5    "sub": "auth0|5e66ecf6e5ccf50cd003ff20",
6    "aud": "vJ0SCKchr4XjC0xHNE8DkH6Pmlg2lkCN",
7    "iat": 1588234071,
8    "exp": 1588270071,
9    "auth_time": 1606723358,
10    "nonce": "kjfhuo34hPxksklj"
11}
sub: This is the unqiue identifier of the authenticated user in your IdP.nonce: The value provided in the original request.
What's next?
You can now proceed to create an authentication provider configuration.